
I’ve been working on a couple of models… a 1/700 Space Battleship Yamato from the 1980’s. Hopefully, I’ll have that done in time for Wonderfest. I also designed and printed new turret guns for that kit. You can see them below.
ahh.. Fudge.
Well the decals, gloss coat and weathering and final parts were all together on my B-47. But I needed to do a quick mask and spray of the tip of the vertical fin. So I took my trusty Tamiya tape and masked a quick line…. It wasn’t quite right so I adjusted it…and took off the fin decal with the tape…#$%^&*(*&^%$%^&!!! One of a kind decals. Nuts. Well this ones in the dustbin… and that’s a damn shame because it was looking really sweet. Sometimes I hate this hobby… hah.
Decals on…
I spent the good part of a couple hours yesterday evening applying decals to the B-47. They went on incredibly well.. and responded to a little setting solution to snuggle down into panel lines. I was planning to put the wing walk boundry markings on, but then hesitated because the kit decals were actually missing part of the decal! On one of the wing walk decals, the part over the fuselage was missing..only on one mind you. Seems an odd screw up. So I opted to just not apply them.


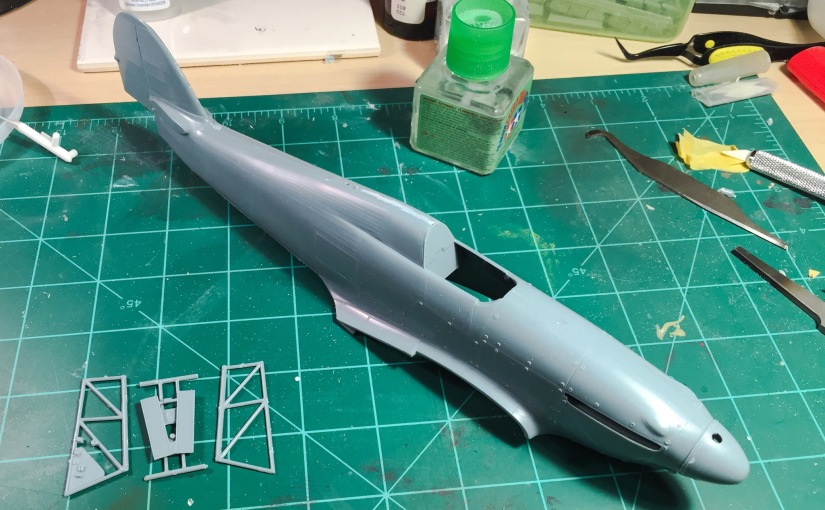
Back in the saddle…. or how to finish what you started…
After building the very nice Airfix Scooter, I thought I’d try a quick turn around and get something else done. Looking through my stash in the garage, I pulled out an Academy B-47 Stratojet which I last touched in March of 2013!. As I looked at it, I realized that I’d started to mask it for painting. So I decided to take the kit in and finish her up. I’d also obtained a set of decals for her that were from a 2000 modeling show in California. Apparently someone sent me the set so I have a pretty interesting bird to model. B-47’s weren’t known for their colorful markings. I think the last I was looking at this kit I was thinking of a WHIFFER in Australian Naval Reconaissence colors because the Aussies apparently contemplated buying them from the US. Anyhow… here’s the finished paint with the gloss coat on ready for decaling. Note that the Tamiya tape came off after two years without issue…

Here’s what she should look like..

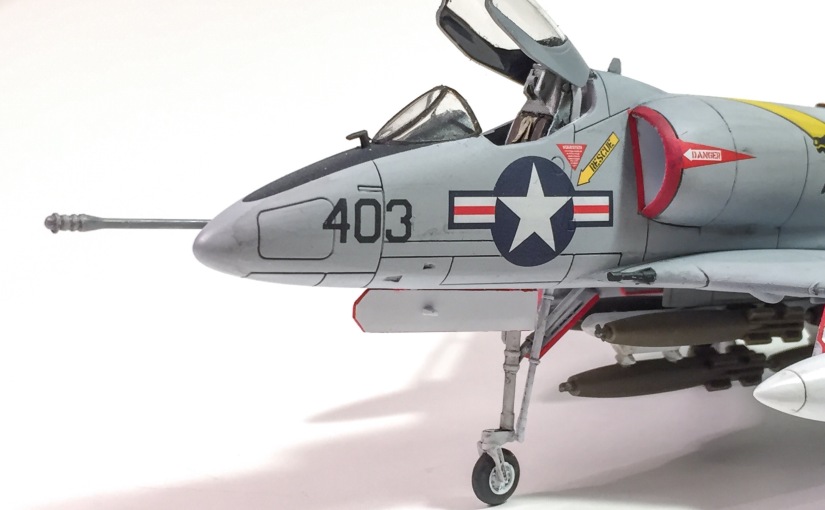
Airfix 1/72 A-4C Skyhawk
The Skyhawk is a great little kit,as we’ve become accustomed to from Airfix. Detail is refined with a slightly pebbled surface that looks good under paint. The kit goes together very well with little need for filler. Below you can see the detail on the engine fan face and the engine exhaust… which is buried very far inside the fuselage.

I painted the fan and exhaust silver and gave them a quick wash of Oil paint lamp black thinned with lighter fluid. The lighter fluid dries quick and allows one to move on quickly.
I opted to close the speed brakes since unless they are under maintenance, they are usually closed on the ground. Here you can see the fine fit of the parts.
Here you can see the fit of the intakes to the fuselage sides. I would say this is the worst fit to be found in the entire kit. The parts needed some careful clean up and there was still a small at the rear of the intake.
I took care of the gap with some Vallejo Plastic filler. This is a great tool and made quick work of the gap .
The cockpit was nicely detailed and the kit decals were more than sufficient to represent the instrument panels. I applied a thin wash of oil paint to subdue the bright white on the panels. I also used a Pavla resin ejection seat since I had one on hand. The kit seat looks great though too. The Pavla seat did sit a little high in the cockpit though and precludes closing the canopy.


Once the fuselage was glued together, the cockpit was masked to spray the IP deck. In fact, I normally spray my entire model black for priming purposes and to start the panel shading.
The drop tanks are a little mis-shappen in the middle, but I didn’t bother to try and fix them… under the wing it’s hard to tell there is an issue with them.
The TER came from an Academy F-8 Crusader kit. I triedto vary the color of the ordnance for a little variety.
Another shot so that you can tell just how well detailed this kit is… these are the main wheels before the oil wash is applied. 
The kit decals went down well with some setting solution. The vortex generators provide an extra obstacle for them to lay down over. 
Once the decals were mostly down, I touched up where the decal had torn around the vortex generators.
Images below of the completed kit. I highly recommend picking one up for a relaxing build.


A little progress
So I closed up the fuselage. This kit is built a little different than the norm. The fuselage is put together and then the cockpit IP and rear bulkhead is put in place. The rest of the cockpit is put into place from the bottom. I then attached some scrap plastic to the bottom of the fuselage-wing join to provide a solid joint. Once the wing is solidly joined, the extra plastic was cut away to allow the resin block for the undercarriage bay to fit. Next will be to slowly join the bottom wing to the top wings-fuselage combo.


The Office
Spent some time working on the cockpit. I assembled the components and put a first coat of Tamiya Cockpit green on everything. The instrument panel was also put together since it must go into the fuselage before anything else is put in place.


Rock Me… (Like a Hurricane)
So this is what I’m up to next PCM’s 1/32 Battle of Britain Hurricane Mk.I.
And look, here’s a build that doesn’t start in the cockpit!


1/144 Tsar Bomb
I have had a 1/144 Revel Bear D in the stash for a while. I wanted to build it differently (Natch) and while researching on Al Gore’s invention something called the Tsar Bomb. It’s the colloqial name for the largest atomic weapon ever detonated. The Soviets decided to pop this atom back in the 60’s. It was 50-52 Megatons worth of nuclear energy. (They toned it down to 50% of capability because they didn’t want too much radiation).
I modeled this in 123D and printed it via shapeways. The nose probes are stretched sprue.


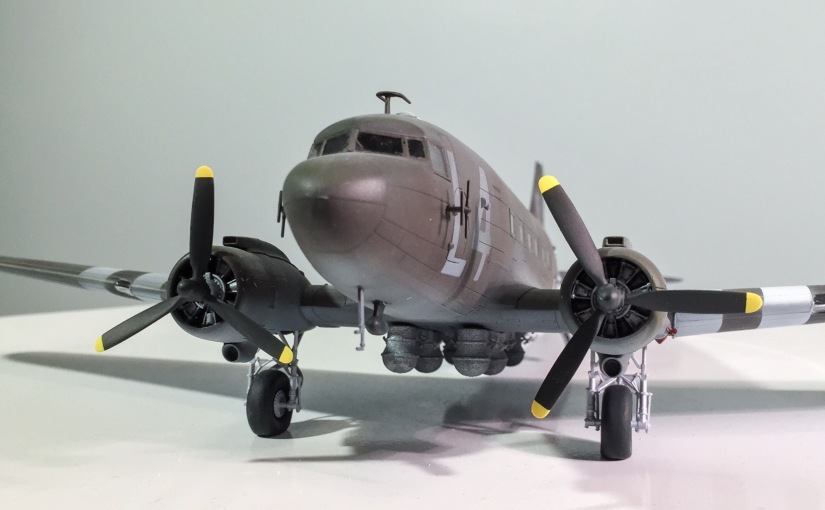
Modeling 1LT Dick Winters D-Day C-47: Complete
Stand up! Hook up! Equipment Check! Count off! Stand in the Door!
Go! Go! Go!
So it wasn’t a bad build. I had two issues, the fuselage windows gave me an issue or two… wherein, I glued them in the wrong way…so that the window framing was on the inside. I had to pop those out and redo them. Then the laser printed serial decals silvered on me. I suppose that I could have fixed it but …hey, it’s a hobby.
I did put the para-racks on the bottom so as far as I know, this is the first 100% correct D-day C-47, because I’ve never seen one with them before. I also used baremetal foil to mask the windows…works great but taking the glue off the window caused an issue since I used acrylics for painting….hard to clean without damaging the paint. In any case… on to the pics.


